


 United Kingdom


 Best Seller
 All Printers
 All Thermal Labels
 Money Counters
 Thermal Label Printer Kits
Want to create durable, professional-looking stickers quickly and affordably? If you already own or are considering investing in a thermal label printer, you can transform this compact office tool into a sticker-making powerhouse. Perfect for product labels, shipping seals, QR code stickers, price tags, and minimalist artwork, thermal printers are a game-changer for small businesses, crafters, and DIY enthusiasts.
Let's walk you through everything you need to know: choosing the right thermal printer and materials, step-by-step instructions for designing and printing, finishing tips for durability, troubleshooting common issues, and creative ideas to inspire your sticker-making journey. Plus, we’ll highlight recommended MUNBYN products to help you get started!
What Can Thermal Printers Do for Sticker-Making?
Thermal label printers use heat to create an image on heat-sensitive labels — no ink, no toner. That makes them fast, low-maintenance, and cheap to run for monochrome labels (black-on-white or clear)—perfect for barcodes, ingredient labels, price tags, and minimalist art stickers. However, thermal printers are typically mono (black/greyscale) and not made for full-colour vinyl artwork; if you want vibrant, multi-colour stickers, you’ll usually use an inkjet or laser printer + printable vinyl instead.
Thermal label printers use heat to create images on heat-sensitive labels—no ink, no toner required. This makes them fast, low-maintenance, and cost-effective for monochrome designs (black on white or clear). They’re ideal for:
- Barcodes and QR codes
- Product and ingredient labels
- Price tags
- Minimalist art stickers
However, thermal printers are typically limited to black-and-white or grayscale printing. If you’re looking to create vibrant, full-color vinyl stickers, you’ll need an inkjet or laser printer with printable vinyl. That said, some advanced models, like MUNBYN’s RW405B (The UK site has not been launched yet), can print in two colors (e.g., blue and black, or red and black) using specific thermal stickers.
What You’ll Need
Here’s a quick checklist of materials and tools to get started:
Essential Gear
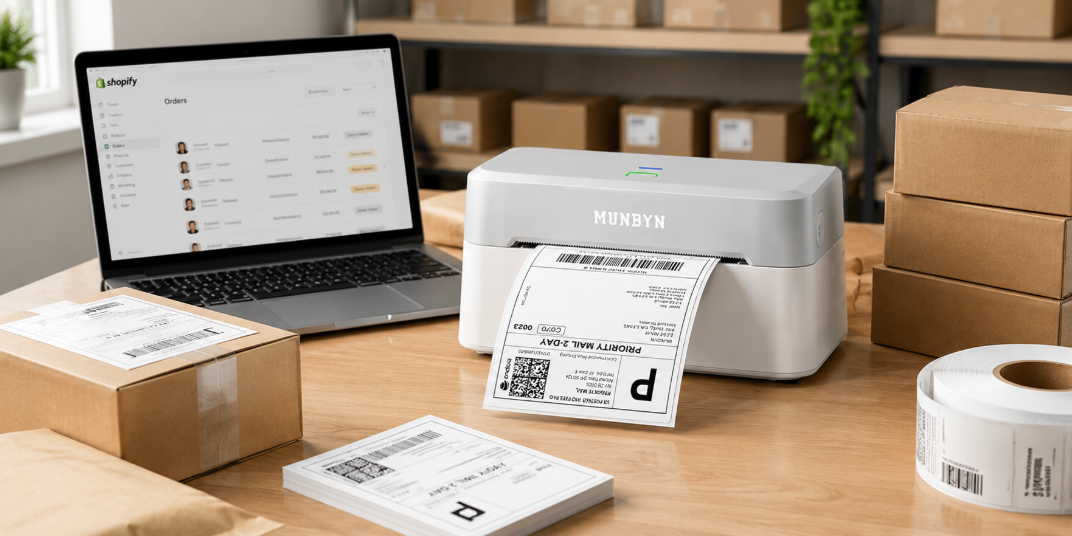
- Thermal Label Printer: Desktop Bluetooth or USB models are perfect for sticker rolls and sheets. Popular options include the MUNBYN RealWriter 941BP and RW411B for their reliability and versatility.
- Thermal Sticker Labels: Choose labels compatible with your printer, available in rolls or fan-fold sheets. Munbyn offers a variety of shapes (round, rectangle, clear) and durable “Five-Proof” waterproof labels.
- Design Software: Use programs like Canva, Adobe Illustrator, Bartender, ZebraDesigner, or Munbyn’s design tool for easy layouts.
Optional Finishing Tools
- Laminator or Laminate Sheets: For added protection against moisture, sunlight, and wear.
- Cutting Tools: Scissors, craft knives, cutting mats, or automatic cutters like Cricut or Silhouette for custom shapes.
- Ruler and Spare Labels: For testing and precision.
Step-by-Step: How to Make Stickers with a Thermal Printer
1. Choose the Right Printer and Labels
Select a thermal label printer that matches the label width you need. Common widths include 2", 3", and 4". MUNBYN’s 4×6 thermal printers are popular among small businesses and crafters for their versatility. For stickers, opt for direct thermal sticker labels. We offer various options, including round, clear, and rectangular rolls, as well as waterproof and “Five-Proof” labels for added durability.
2. Design Your Stickers
Create your sticker design using design software. Here’s how to ensure the best results:
- Set Up a Template: Match your label size and include any necessary registration marks or label gaps.
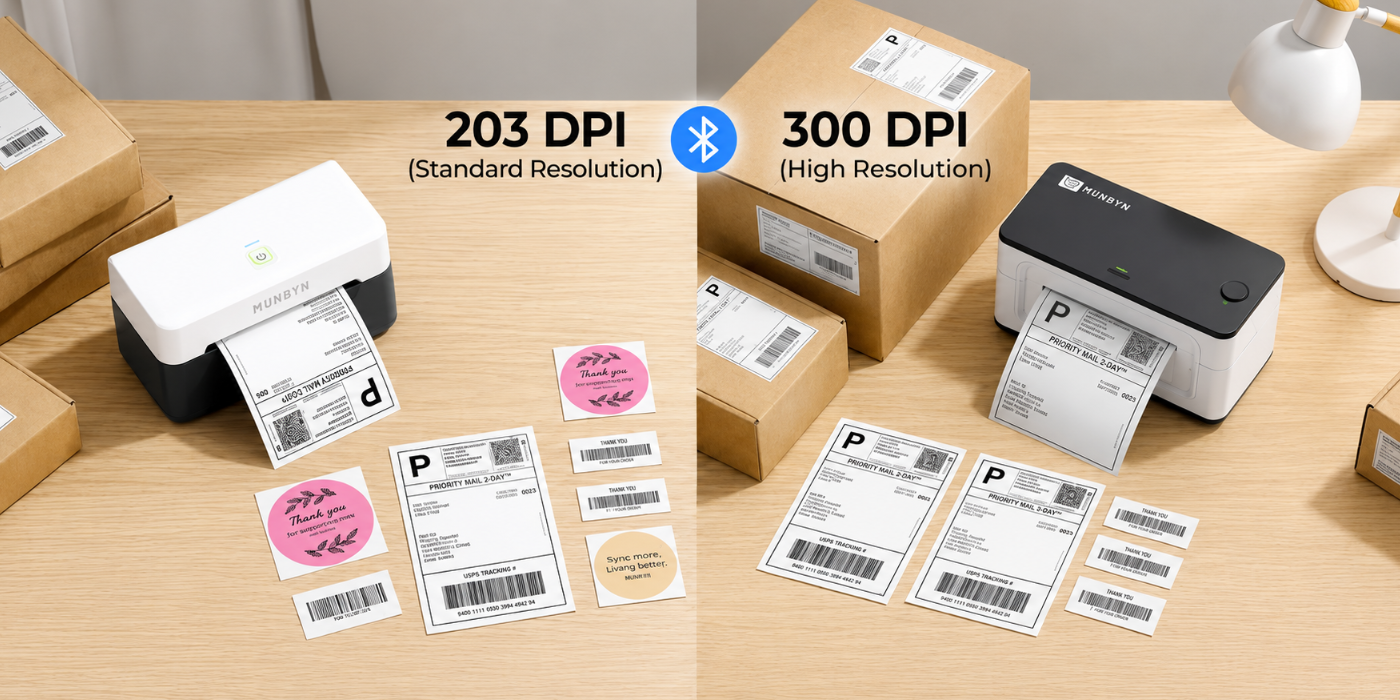
- Use High-Quality Graphics: Vector art or 300 DPI images work best for sharp, clean prints.
- Optimize for Thermal Printing: Thermal printers excel at solid black designs. For small text or fine details, increase resolution or adjust line thickness to ensure clarity.
Pro Tip: For more intricate designs, consider a 300 DPI printer like Munbyn’s premium models, which offer sharper detail for smaller graphics.

3. Configure Your Printer and Test Print
- Install the printer driver or use the Munbyn app/extension.
- Select the correct label size and choose the highest print quality in your settings.
- Load your sticker roll or sheet and run a test print to check alignment and print darkness.
4. Print Your Stickers
Once your test print looks great, you’re ready to produce your sticker run! Thermal printing is fast and smudge-free, so your stickers will be ready for use immediately. Use pre-cut rolls or fan-fold sheets for easy handling.
5. Finish and Cut Your Stickers
- Make custom stickers (not available yet) on MUNBYN.
- Pre-Cut Labels: Simply peel and stick.
- Continuous Labels: Use scissors, craft knives, or a cutting machine to create custom shapes.
- Add Lamination: For stickers exposed to moisture, sunlight, or heavy handling, apply a cold self-adhesive laminate or use a thermal laminator before cutting.
Durability and Care Tips
- Direct Thermal Labels: While affordable and quick to print, direct thermal stickers can fade over time with exposure to heat or light. For long-lasting results, use high-quality thermal labels like Munbyn’s “Five-Proof” options.
- Lamination: Adding a laminate layer significantly improves water resistance and durability, especially for outdoor or refrigerated use.
- Printer Maintenance: Clean the print head regularly and use compatible media to extend the life of your printer.
Pro Tips for Professional-Looking Stickers
- Match the Label to the Job: White paper labels are budget-friendly but not waterproof. For product labels or stickers exposed to moisture, choose MUNBYN Five-Proof labels or waterproof synthetic labels.
- Experiment with Materials: Use colored or metallic label stock (e.g., holographic or gold) to make simple black designs pop. MUNBYN offers holographic and gold transparent rolls for dramatic effects.
- Batch Your Layouts: Arrange multiple sticker designs on a single roll or sheet to save time on printing and cutting.
- Invest in a Cutting Machine: For unique shapes and kiss-cut sheets, a cutting machine like Cricut or Silhouette elevates your sticker game and speeds up production.
Troubleshooting Common Issues
- Faded or Uneven Prints: Check that you’re using compatible label stock and clean the print head. Avoid exposing labels to high heat or direct sunlight.
- Low Image Detail: Ensure your design resolution matches the printer’s DPI. For intricate designs, a 300 DPI printer will deliver better results.
- Label Jams: Verify roll orientation and sensor alignment. Many Munbyn printers include guides to prevent misfeeds.
Creative Sticker Ideas

- Product Branding: Use kraft or holographic stickers to enhance packaging.
- Custom Craft Stickers: Create unique designs for planners, scrapbooks, or party favors.
- Promotional Labels: Print limited-edition holographic or gold stickers for events and giveaways.
- Organizational Labels: Make monochrome labels for home or office use, featuring barcodes or QR codes.
Final Thoughts
Making stickers with a thermal printer is an easy, cost-effective way to produce professional-quality labels and stickers for small businesses, online shops, and creative projects. With the right thermal printer, quality sticker paper, and a thoughtful design, you can create custom stickers in minutes—without the mess or expense of ink-based printing.
Thermal printers are particularly well-suited for monochrome stickers like product labels, barcodes, QR codes, and minimalist designs. Paired with durable thermal labels from Munbyn, you’ll enjoy consistent print quality, fast production, and long-term savings. Whether you’re just starting or scaling up your sticker-making business, investing in the right tools and materials ensures your stickers look polished, last longer, and stick perfectly every time. Use the discount code "MYSEO" to enjoy an extra 8% off siteside.
FAQs
Q1. Are thermal stickers waterproof?
A: Standard direct thermal stickers are water-resistant but not fully waterproof. High-quality thermal labels like Munbyn’s “Five-Proof” options are oil-proof, scratch-resistant, and moisture-resistant. For maximum durability, apply a laminate layer.
Q2. How long do thermal stickers last?
A: Thermal stickers typically last 6–24 months, depending on storage conditions. Prolonged exposure to heat, sunlight, or friction can cause fading.
Q3. Are thermal printers good for small businesses?
A: Absolutely! Thermal printers are ideal for small businesses, Etsy sellers, and online shops, offering fast, reliable, and low-maintenance printing for shipping labels, branding stickers, and more.
Q4. Do I need a cutting machine?
A: Not necessarily. Many thermal stickers come pre-cut, but for custom shapes, a manual cutter or cutting machine can be helpful.
Q5. Can I use a thermal printer for craft stickers?
A: Yes! Thermal printers work great for minimalist designs, text labels, planner stickers, and simple illustrations.
Q6. Which thermal printer is best for stickers?
A: A versatile desktop thermal printer with support for multiple label sizes is ideal. Munbyn printers are highly recommended for their quality, compatibility, and wide range of thermal sticker options.
Share:
Thermal, Inkjet or Laser Printing: Pros & Cons for Your Business
What is The Best Mini Thermal Printer for a Small Business?